Tuesday, 25 February 2014

I'm back!!!! First birthday card!

Hi! I'm back!!!!
We went away for mid-term break to visit family and friends... we had a lovely time, it's great to catch up with friends I haven't seen for a while...

Anyway, it will be a quick post today, as it seems I haven't only brought happy memories from my time away... I've brought the worst of the colds (or flu, never know the difference...).

I also want to let you all know that Scribble and Scrap Crafts is having a

SALE!!!!


So today's card, I decided to make a 1st birthday card for a Baby Girl...


This time I used this card sketch from Fussy and Fancy challenge. So many nice layers, I had to try it!!!

For the vertical layer, I used striped paper and a punched border. 
I used a paper doily for the circle layer, and wide ribbon for the horizontal layer.


I used:

Digital stamp "Walker" by Mo Manning (I really wanted to used this image again... I've just used it once before I started blogging, isn't she cute?
Papers: small polka dots and stripe papers are freebies from craft magazine; Snippets collection by Studio Calico (yellow checked paper) and a small scrap of paper from  First Edition Love Letters (pink polka dots behind sentiment)

I hand-stitched the background paper and image with white thread.


Promarkers I used:

Sandstone, Buttercup, Eggnogg
Vanilla, Almond
Pink Carnation, Blossom, Pink Mittens
Mustard


The flowers and pearls are from Wild Orchid Crafts.
Buttons, charm, heart rhinestone (on top of charm), bow, ribbon and washi tape are from local shops.

I created the sentiment on my computer and put it on top of a circle die-cut.

I'm entering this card into the following challenges (in alphabetical order)


Creative Corner challenges - A little bit (pink polka dot paper circle is from a  piece of scrap, buttons,pearls)
Just Inspirational - Hearts and ribbon (heart rhinestone and pink wide ribbon)
Mo's digital challenge #222 - Use ribbon with Mo image
Oldie but a Goodie - Buttons (bow, ribbon, charm, rhinestone are old stash) 2nd entry


I really hope you like this card. If you do, please leave a comment.. and don't forget to follow if you are not already!!!

Until next time!!!


Tuesday, 18 February 2014

GDT post for Digi Choosday week 7!

Morning!!!

Today it's my 2nd week (and last) as GDT for Digi Choosday

I would like to thank Nikki and all the Digi Choosday team for having me!

This week's theme is

Shaping Up

and this is my GDT card!


I decided to make a shaped card, with my Go Kreate die.
I  built up the layers on the card using different shapes: scallop circle (nesting dies), Doily Die (Sizzix Doily die) and the image and sentiment on rectangles.

The image is from Nikki Hall at the Polkadoodles store called "Dollie Daydream - Sleepy head". It's so much fun!!! The image includes the sentiment and the heart flower pot, but I decided to separate and resize the 3 elements to build my layers with them in form of shapes.This image is so versatile!
I also chose her because she's in such a good shape that it followed this week's theme!!!


The Papers are also from Polkadoodles.

I used Tim Holtz Distress Ink in Tattered rose on all the paper edges.


I used my Promarkers to colour Dollie.

I used: buttercup, cornflower, powder blue, pink carnation, blossom, poweder pink, vanilla, almond, antique pink and the blender pen.


I didn't want to put a lot of embellishments on this card, just used a ribbon picking out from the sentiment, two kinds of washi tape, some buttons, two little heart rhinestones on the sentiment and the La La land banner die.
I also added a bit of Anita's 3D gloss on the heart (flower pot)


I'd also like to enter this card into the following challenges:

Inkspirational challenge #50 - Tic Tac Toe ( my line is: shaped card, ribbon or lace, punch or die cut)


I really hope you like my GDT card for Digi Choosday.
They have a brand new site, new image and exciting things coming, so hop over, take a look at the amazing DT inspiration and join in the fun!!!!

Please leave a comment with any feedback and don't forget to follow. it makes me really happy!!!!

Until Next time!


Monday, 17 February 2014

Red brightens up the day!!!!

Hiya!!!! Happy Monday! I hope you've all had a great weekend and ready for the week ahead! Alaia is on holiday this week, but she's got the sniffles again! great, not!!! she will hopefully get better soon and enjoy her week off!

I've been really busy with my cards for the last week... making lots of cards for the next few weeks (secret, I can't show you yet ...)... last night I went to bed at 4am, but hey ho! sometimes we have to suffer for our art!!! lol. Luckily, as Alaia is off from school, I didn't need to get up really early!

I'm also trying to improve my colouring... I haven't been very happy with it lately... the colours don't seem to blend right, not sure if I haven't got the right shades of Promarkers or the paper is not right (yeah, I've realised there are some papers that blend a lot better than others!), or it's just me!!! I would love to go to some sort of class to learn how to colour properly, but nothing near where I live... Thankfully, this amazing thing called You Tube is always there to give me some tips!

In today's card I really tried with my colouring, hopefully it shows! I only have one shade of red (Poppy) so I used some cool greys for shadowing!
Here is today's card....


after yesterday's boys cards, I had a girly card withdrawal!!!

I used a Saturated Canary digital stamp I've had for a while but I'd never used... 
It's called "Sweet Oklahoma". I love all the details, her hair blowing, the awkward pose... 

The papers I've used are from: Crate Paper DIY shop (the flowery one) and a freebie from a card making magazine last year (musical notes).

I hand-stitched around all the layers of paper with white thread.

all the borders have been distressed with the Tim Holtz distresser and inked with Tim Holtz distress ink pad in Tea Dye.

I also used as a layer a piece of corrugated paper I made myself with my crimper (another of my not-so-used tools,  from Woodware Craft).


As always, I used my Promarkers to colour the image.

For the  hair I used: Burnt Sienna, Raw Sienna, Cocoa, Sandstone, Buttercup and Satin.

For all the red areas: Poppy and Cool Grey 1 to 4.

For the grey areas: Cool grey 1 to 4.

For the skin: vanilla, almond and blossom.


I framed the image in a rectangle, leaving some parts of the image outside the frame. 


The embellishments and bits and bobs I used are:

Heart die cut (Sizzix Bigz die), that I covered firstly in glitter, and then in enamel embossing powder in white foam from Papermania (heated with the heating tool).

I also used this embossing powder around the image, especially all the edges and corners; and the sentiment (from a stamp set from Kanvan) that I stamped with Versamark embossing ink and embossed with the same embossing powder.... I also sprinkled the embossing powder around the sentiment. I really like this "messy" effect!!!

The pin holding the sentiment is from Tim Holtz.

The Flowers,pearls and pearl brad are from Wild Orchid Crafts.

The leaves are die cuts from Marianne Creatables.

The button, ribbon, lace and charm are from local shops.


I'm entering this card into the following challenges:

All sorts challenge #246 - Use brads (pearl brad at bottom corner)
Aud Sentiments #100 - Bingo (my line is: Two word sentiment, 3D item (flowers, button, brad) and use something shiny (charm) 2nd entry
Digi Designs - Tic Tac Toe (my line is: digi, die cut and flowers)
Hanna and Friends #190 - Bingo (my line is: stitching, ribbon and flowers)
Inkspirational challenge #50 - Tic Tac Toe (my line is: distressing, ribbon or lace, buttons or brads)
Whoopsi Daisy - Use two or more die cuts (Sizzix bigz heart die cut and Marianne Creatables leaves die cut)


I hope you like my card!!!! Please leave me some love in the comments if you do... and don't forget to follow if you are not already... Thanks! 

Until next time!!!!


Sunday, 16 February 2014

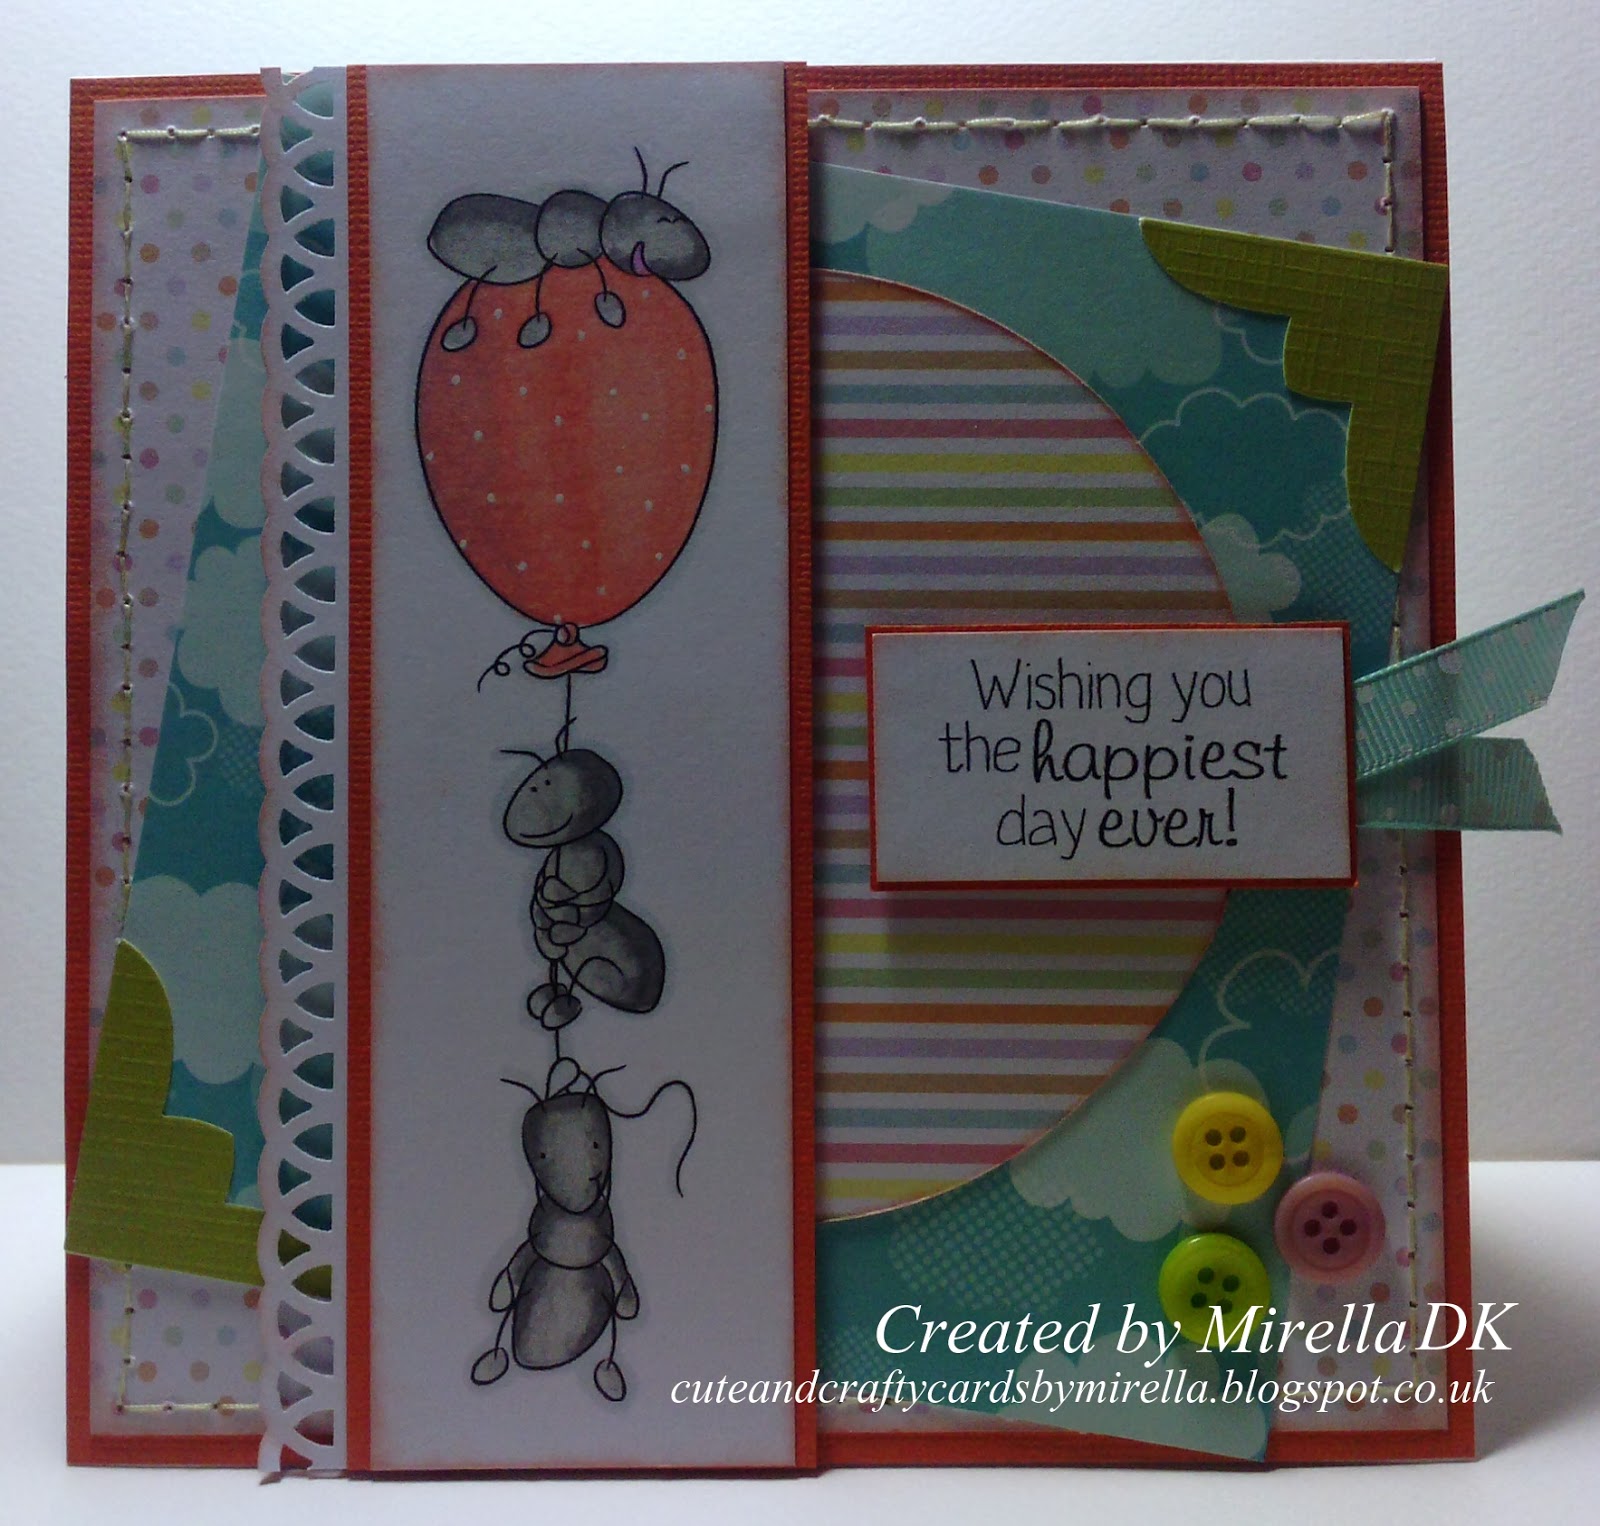
Sentimental Sundays DT post #194 : Pack a Puch (use a punch or die cut)

Hello again! I'm back (busy Sunday!!!) as it's time for a new challenge at 

Sentimental Sundays

Today's theme at Sentimental Sundays challenge is:

Pack a Punch (use a punch or die cut)
(plus a sentiment)


Easy!!!! I don't know about you, but I hardly make a card without using a punch or die cut!!!

This week's sponsor is Doodle Pantry.


they kindly donated an image for me to work with, and I chose a really fun one called "Balloon Ants", aren't they cute??!!!


The papers I've used are from: Paparmania Capsule collections Pastel Spots and Stripes and Let's fly away Paper Stack (this was a freebie with Quick Cards magazine a few years ago). I though this paper will look great as the ants are flying... 


I used my Promarkers to colour the image.

I used: coral, peach, soft peach and cool grey 5 to 1.


The sentiment is 1 out of 5 sentiments included with the digital image package. I used the Happy birthday one, but there are another 4 really fun sentiments.

I hand-stitched the background layer with yellow thread.

I built up the layers, playing with different shapes

I used two punches: a border punch along the main image and a corner punch.

To embellish, I just used some ribbon and 3 buttons.

So, don't wait a minute, hop over to Sentimental Sundays challenge and join us. A really easy challenge this week, no excuses!!! My team mates also have really cool cards to show you, so don't forget to check them out!

I'm also entering this card into the following challenges: 


Cute Card thursday #308 - Clever cutting (I've used punches) 2nd entry


Please leave a comment if you can, they make me happy!!!

and don't forget to follow! :)

Thank you for stopping by!!!
Until very soon


Scribble and Scrap DT post: challenge #12

Morning!!! Happy Sunday!!!!

I hope you are all doing ok, safe at home and not very affected by the horrible weather... in here it is really good, we haven't had any of the heavy rain or winds... just cold, freezing cold, but the sun come out quite often, that makes me happy.... 

As every other Sunday, I'm here, bright and early... because it's time for ....


As usual, there will be a Random drawn winner, who will get a £15 voucher to spend in the Scribble and Scrap shop. 
But if the Random drawn winner has used a product from www.scribbleandscrap.co.uk the prize will be a £20 voucher instead of a £15 voucher.
Also each of the Top Three will win a £5 voucher to spend at www.scribbleandscrap.co.uk
how cool is that???


Also, you should check out the Scribble and Scrap Craft shop... Lexi has been working really hard and has made some beautiful digital papers that I can't wait to work with.... I'll show you my creations with them soon! also new cute digis and sentiment sheets... go and check them out!

My team mates and I have been really busy making beautiful cards for your inspiration... don't forget to hop over to the new challenge to take a look !!!

So, I made a card using one of Scribble and Scrap digis, The Puglies - Charles!!!


It's a boyish card.. I used a lot of layers and stars (I might have overdone the stars.... lol)

The Papers I've used are from: American Crafts 5th & Frolic, Studio Calico Darling Dear  paper pad,  Studio Calico Snippets Collection.

As you know, I love my embellishments, and when making boys/men cards is so difficult! so I decided to play around with the stars, in different sizes, a button and two long and colourful metallic brads.
I also used a corner punch.

I used my Promarkers to colour Charles. I used:

Burn Sienna, Raw Sienna, Sandstone and Buttercup for the hair and ball.
Vanilla, Almond and Blossom for the skin.
Leaf Green, Moss, tulip yellow and buttercup for the clothes.

I fussy-cut Charles and glued him to a circle card stock. I used a bit of  sticky foam pad to raise his foot and ball, as he's kicking the ball (difficult to see in the picture).

I created the sentiment on my computer. I really love this Scrabble looking font, it's called "Scramble".

I'm also entering this card into the following challenges:

A little bit crafty - Man Up 
All Sorts challenge #246 -  Use Brads (long metallic orange and green brads)
Crafting by Designs Monthly challenge -  February AG
 -Crafty Hazelnut's patterned paper - AG with patterned paper
Cute Card Thursday #308 - Clever Cutting (fussy cut image and die cuts)
Sister Act #45 - Anything goes
The Crafty Bloggers Network - All About the boys


I would love it if you leave me a comment... and don't forget to follow.

See you later with my second post of the day!!!


Friday, 14 February 2014

A Suitcase card!

Hiya!!!! I hope you are all doing good! It's Friday!!!! so glad the weekend is almost here...
My week's been average... I've been quite busy, but I wasn't really in the mood for crafting... I made  a few cards, that I will be showing you in the future, as I can't yet. Really happy how they ended up, even when I really struggled to make them!
But last night, I said, enough is enough! and made a card to blog today...
I was feeling in the mood of creating something different... so I decided to make a Suitcase shaped card!
  We love travelling, we do it as much as we can!!! but we still have so many places to go... My husband and I have been in Paris, but not together!!! we went when we didn't know each other, separately... that is one trip we would love to make soon... And I would love to go to America... we've never crossed the Big Pond. Hopefully in a near future we will be able to take Alaia to Disneyworld....
 so my inspiration to make this card is my suitcase (picture at the bottom of this blog post).


I used an A5 card base, and decorated it in the shape of a vintage looking suitcase using cardstock and some pretty papers!!!! both papers (the green checked paper and the vintage map paper) are from K&Company.

The image I've used is from Tiddly Inks and it's called Joy ride.


I paper-pieced the car with a piece of scrap paper. 
The paper was bright pink to begin with, but then I realised that it was too bright for this card, so I toned it down using Tim Holtz Distress Ink Pad in Old Paper.
I also used this ink to distress all the edges of the papers and card stock.

I used Promarkers to colour the rest of the image:

Suitcases: Burnt sienna, Raw sienna, sandstone, buttercup and blossom.
Girl: Moss, Apple, Burn Sienna, Raw Sienna, Sandstone, buttercup, Almond and blossom.
For the car wheels: cool grey 1 to 4, blossom and tulip yellow. I also used Tulip Yellow for the head lights.


I hand-stitched around the main image with soft green thread. 

The postmarks stamps are from Kaisercraft. 

The suitcase handle is made with square nesting dies.
and a corner punch for the corners.

To embellish I used:
Gold coloured brads
Mini Postcards (I bought them ages ago on-line, and it's the first time I've used them!)
Stickers (passport sticker and postcards stickers -with Eiffel tower and Pisa Tower), from the Pound shop, I also bought them ages ago.
Buttons
2 types of washi tape.

The sentiment is from a Sticker pad I've recently bought from Do-Crafts Papermania called Madame Payraud's. I added some ribbon to the sentiment, I love embellishments!


my inspiration object

I'm entering this card into the following challenges (in alphabetical order)

As you like it #21 - Use and inspirational object (& why):  my inspirational object is my suitcase... packing my suitcase I'm going away somewhere, on holidays, to visit friends and family... we love travelling and try to go as often as we can.... so many place to go!!!)
Aud Sentiments #100 - Bingo (Two word sentiment -Best Wishes-, 3D items -buttons, postcard and passport stickers, brads-; Use something shiny -brads-)
Brown Sugar challenge #81 - Use a die/cut or punch
I love Promarkers #206 - Gingham/Plaid/Checks  (green checked paper at the top)
Whoosi Daisy - Include a sentiment 2nd entry


I really hope you like my card! If you do, please leave a comment, they make me happy!!!
and don't forget to follow!!!! :)


Tuesday, 11 February 2014

Guest Designing Spot for Digi Choosday: Fashionable Fun

Hello! I hope you are having a great week so far... I'm trying to get back into my crafting mood after a few days away... I will be getting really busy in the next few days, as going away next week again!

Today's post is a special post, as this is my first of two weeks as Guest Designer for  Digi Choosday challenge!!!! The very talented Nikky Hall invited me to Guest Design for the challenge and it would have been crazy to say no!!! she's got beautiful images and products in the Polkadoodles shop... you need to check it out!!!
It is also a really special day for Digi Choosday, as from today, they have their own dedicated blog challenge, which are launching today!!!!
No need to say that I'm thrilled!!! Thank you Nikky!

The theme for Week 6 of the Digi Choosday challenges is Fashionable Fun. Great challenge theme!!! 
You should check the challenge out and join in the fun!!!!

I chose a great image by Nikky Hall called "Dollie Daydream - shopping with Itsy".


It had been a while that I had made an easel card, so decided to make one this time.

The pink background paper I've used is also from Polkadoodles. 
I also used a piece of Scrap paper as an extra layer behind the main image.
I also used a piece of paper thread mesh for layering. My friend got me a big piece of this mesh from Poland ages ago.
The main image and background is all hand-stitched around with white thread. 


I coloured the lovely Dollie with my Promarkers.

I used: 
cool grey 1 to 5; pink carnation, blossom, pink mittens for the hat, clothes and some of the bags.
Burnt sienna, raw sienna, sandstone and buttercup for the hair.
Vanilla, almond, blossom for the skin.
Mustard, buttercup and eggnog for hat flower, and bags.
Raw Sienna, Sandstone and buttercup for the dog.


I used some liquid pearls to embellish around the image.


On the front page, I also used:
border punch
Marianne Creatables corner die
Pearls from Wild Orchid Crafts
Paper flowers from local shop.


I decided to place the sentiment at the base of the card, as I wanted the image to be the main feature at the front.
I chose this sentiment as It summarises what fashion means to me....
For me Fashion is wearing what I am comfortable with. Wearing clothes that I like just because they suit me and I like, depending on my mood... not just because they are in fashion.
I love the sentiment. I created it on my computer.
I also added a tag to write the greeting. the tag is a die from Joycrafts.


I would also like to enter this card into the following challenges:

613 Avenue Create - Anything goes or Create your own challenge  (1. image, sentiment, patterned paper; 2. die cut, paper punch; 3. liquid pearls; 4. pearls, flowers; 5. ribbon, real stitching) 2nd entry


Please leave me some love in the comments! and don't forget to follow if you haven't done so!!!

Thank you for coming to visit.

Until next time!


Monday, 10 February 2014

Tutorial for the Scribble and Scrap challenge: handmade Grunge/Vintage flower


Morning!!! Happy Monday!!! 

This is the tutorial that I have put together for the Scribble and Scrap challenge
I hope you like it and find it useful!!!

As you may know if you have seen any of my cards, I love embellishments, the more the merrier! And of course, my favourite embellishments are flowers! A while ago, I decided that I wanted to try to make a Grunge style card. But when the time to put some nice embellishments came, I realised that all my flowers were too pretty and “clean” looking for that card!
So looking around on the amazing world of the internet, I got inspired to make my own grunge/shabby/vintage flower. Since then, I've adapted the process to my own liking and way of working.

You will need :


I use watercolour paper as it tends to be stronger when wet.
You will need to die cut 16 single leaves for one flower. You can always put less leaves if you like flatter flowers.
(If you don't have a leaf die, you can free cut the leaves yourself)


Soak the leaves in water. I usually leave a few soaking for a few minutes at a time.
Then, roll the wet leaves. After rolling, I twist and crunch them as I want them to have a lot of creases when they dry.


Once they dry up (after a few hours should be OK, but just make sure they are totally dry as they might break if still damp), start unrolling them, but still leaving the creases on, don't flatten them completely.


Some of the leaves will be flatter or less creased than others... don't worry, you can always crease them a bit with your hands... I also put the flatter leaves as a first layer for the flower, to make a base for the rest of the layers.

At this point, I use my distress inks to ink the creases and edges of the leaves.


Now, it's time to start building the flower.
I place a bit of double sided tape, with one side peeled, and place the first layer of leaves/petals. The thinner part of the leaf should go to the inside of the flower.
Afterwards, using glue, I'll keep on building the layers.


After placing the last layer, I will use the top side of a paint brush to push the petals all together and to shape the flower at the same time... the glue won't be dry yet, so you can slightly move the petals to get them in the right place.


Once the glue is dry, you can add a rhinestone (it should be a bit big to cover the middle of the flower).
You can also use shop-bought stamens, for a more realistic look.

As a last touch, I use the distress ink again, to give the flower a bit of colour depth. Sometimes I use a different ink colour, for a bit of contrast, like I've done in the flower at the bottom.


I really hope you have enjoyed my first ever tutorial and that it has inspired you to try to make your own flowers! You can always adapt this tutorial to your own taste and technique.

Thank you! Until next time!


Sunday, 9 February 2014

Sentimental Sundays DT post: Add Sparkles, Blings and Buttons

Hello! I hope you are all having a lovely weekend!!!! there is no crafting for me this weekend as I'm away in Aberdeen visiting friends!

It's Sunday, and that means it's time for a new challenge at Sentimental Sundays!!!!

This week, my fellow DT Sandy has chosen the theme:

Add Sparkles, Blings and Buttons
(plus a sentiment)


Our sponsor this week is All Dressed Up.


I love these images! they are all adorable!!!

So, come on, after reading about the great card I've made for your inspiration, hop over to Sentimental Sundays challenge, take a look at my fellow DTs cards for inspiration and join us!!!


All Dressed up kindly donated some images for us to work with, and I chose "Wear with Style".
When you get this image, it contains 5 files; all four girls together and individually.

This is the card I made for your inspiration:


I made the card in one of my favourite colour combinations: pink and yellow. I find it so cute and girly!

The papers I've used on this card are from: Papermania Capsule collection Spots and Stripes (the pink stripe paper behind image), First Edition Rose Carden (pink and white spots paper). the rest are freebies from craft magazine.
I also used as one of the layers a journaling card from Papermania called "Happy Days".

I distressed all the papers with the Tim Holtz distressing tool and Tim Holtz distress ink pad in Tattered Rose.


As usual, I coloured the image with my Promarkers.

For the hair: Cocoa, Burn Sienna, Raw Sienna, Sandstone and Buttercup.
For the skin: Vanilla, Almond and Blossom as a blusher.
For the Dress: Antique Pink, Pink Carnation, Blossom and Pink Mittens.
For bow belt, shoes and leggins: mustard, Buttercup.

I added some stickles / glitter glue on the dress for the sparkly effect! (it's really difficult to see in the photo, but it's there, I promise!)


As part of the layering for the card I also used: a doily and a piece of mesh lace.
I also added some washi tape (clear with gold writing, I love it!) and a piece of lace and ribbon behind the image.

The flowers are from Wild Orchid Crafts.
I used the Marianne Createable leaves die for the leaves.
Buttons,rhinestones, lace, ribbon, bow and buttons are from local shops.

I created the sentiment on my computer.


I'm also entering this card into the following challenges (in alphabetical order):

613 Avenue Create #58 - AG or Create your own challenge (I used: 1.image, sentiment, patterned paper; 2. die cut (leaves); 3. stickles; 4. buttons, bling, flowers; 5. ribbon, lace
Cards Galore Encore #2 - Bling
Challenges 4 everybody #38 - Anything goes 2nd entry
Come and Get It - Make it Girly 
Crafting by Designs Monthly challenge - Anything goes
Crafty Boots - Bingo (pink, stamp and die cut) 2nd entry
Crafty Girls #11 - Anything goes
Crafty Hazelnut's Patterned Paper - anything goes with patterned paper
Crafty Ribbons #75 - Anything goes with Ribbon
Delightful challenges - Anything goes
Divas by Design - Die Cuts (Marianne Creatables leaves die cut)
Feeling Crafty #25 - Dies and/or punches (Marianne Creatables leaves die cut) 2nd entry
Inky Impressions #145 - For someone special 
Loves Rubberstamps #89 - Anything goes 2nd entry
My Mum's craft shop #14 - Spots and Stripes (3 different papers with spots and one paper with stripes behind image)
My Time to Craft #234 - Buttons and Bows (GDT)
One Crazy Stamper - anything goes 4th entry
Papertake Weekly - Anything goes, optional extra make a shaped card (scallop square card) 2nd entry
Passion for Promarkers #233 - Spots and Stripes (3 different papers with spots and one paper with stripes behind image)
Penny's challenge #163 - Something old and Something new (sth. old: bow, buttons, lace and ribbon; sth. new: journaling card "With Love" behind image is new and washi tape is less than one month old) 2nd entry
Pile it On challenge #6 - Stripes and/or Dots
Sister Act #43 - Anything goes
The Ribbon Carousel #90 - Washi tape challenge
Through the Craft Room door - Anything goes  2nd entry
Top Tip Tuesday - Girly challenge
Use your stuff #121 - Song Inspiration ("Pretty in Pink" by Psychedelic Furs - from soundtrack from 80's movie also named "Pretty in Pink") yeah, I'm an 80's girl!!!! lol


I really hope you like my Sentimental Sundays inspiration card! now join us in the fun!

Thank you! don't forget to leave me some love in the comments and to follow if you haven't done so!

Until next time!!!


Related Posts Plugin for WordPress, Blogger...